5 Reasons To Avoid DIY Sunscreen Options

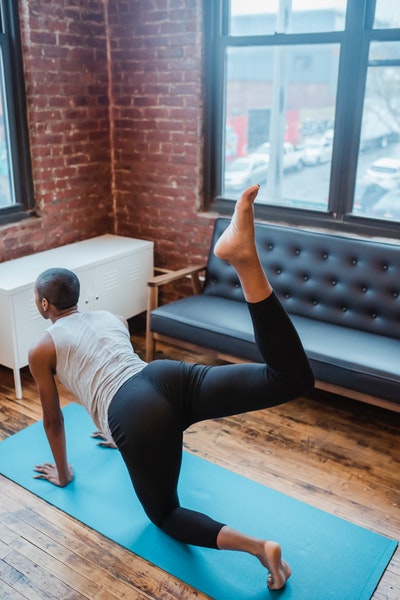
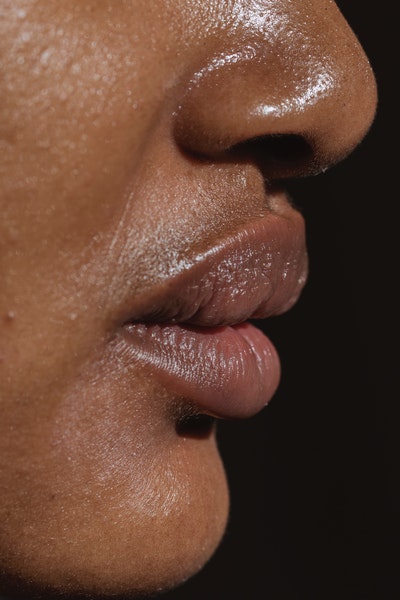
Fans of DIY beauty often cite the overuse of chemicals as the primary reason for avoiding commercial beauty products. Understandably, people want clean, sustainable, and healthy products, especially when discussing items used on the skin. However, the matter gets complicated when talking about sunscreen.

Some advocates of the natural and DIY beauty movement disavow commercial sunscreen because of its dependence on chemicals. However, there is currently no DIY option considered safe or effective for personal use. According to several dermatologists, DIY methodologies can result in severe burns or a lack of UV protection — researchers found many formulas do not specify SPF protection. When tested, some recipes provided a sun protection factor of 2, well below the recommended SPF 30.

While DIY enthusiasts have legitimate objections to some ingredients in many popular sunscreen products, DIY options are not capable of protecting against UV rays. There are many reasons for DIY's failure to develop an adequate sunscreen replacement, but most experts agree on five.

1. Efficacy

How long does a DIY sunscreen last, what is its SPF, and how do you know? The problem with most DIY sunscreen options is a lack of research or evidence to support their efficacy. It is impossible to understand the effectiveness of a formula without testing it in a laboratory.

Commercial sunscreens undergo vigorous testing to ensure they are effective on various skin types, weather conditions, and applications. Without lab tests, you cannot know how effective a DIY option is, and you will be hard-pressed to find DIY recipes with documented lab results and scientific support for SPF and coverage claims.

2. Time Effectiveness

SPF protects your skin against erythema, also known as sunburn. The strength of the SPF indicates how long you can stay in the sun before your skin begins to turn red. However, the skin change induced by solar radiation is not a flawless method for identifying SPF strength or timing effectiveness because erythema can occur between six to 24 hours after exposure.

Therefore, while some people believe you can test the strength and effectiveness of a DIY sunscreen by sitting in the sun and waiting to see a reaction, the process in and of itself is ineffective. The only way to understand the SPF value and strength of the formula is in a lab.

3. Formulation Challenge

Even when a person finds an effective SPF carrier, all other ingredients in the sunscreen recipe affect the agent. Additionally, the SPF is further affected by the manufacturing process. Without a lab and rigorous testing, it is impossible to know if specific ingredients or methods dilute or bolster the SPF carrier.

4. Ingredient Stability

Stability is a complex issue when discussing sunscreen. A manufacturer must ensure that the products are stable with each other and photostable, meaning stable in the sun. On top of stability, concerns are concerns about degradation, oxidation, preservation, and clumping.

When sunscreen is not mixed precisely, it can become volatile or ineffective. Most DIY recipes are not built on the presence of consistency, effectively negating stability. Only a lab with the proper equipment can create an effective, stable sunscreen without presenting significant risks to the consumer.

5. Safety

Safety is the primary concern when discussing DIY sunscreen options. The mix of the wrong chemicals can result in burns, and using ineffective recipes leaves people exposed to UV rays. Dependence on DIY sunscreens can lead to greater sun exposure and increased skin cancer risks.

Commercial sunscreen is the only viable, reputable, and effective sunscreen option. DIY options are untested, variable, and unsafe.

5 Stretches To Release Tight Hips

Often due to sitting at a desk for hours every day, hip pain is a common issue among adults. Stretching can provide some relief by opening up the hips, encouraging flexibility, and helping with mobility. Stretching helps extend tight muscles and, over time, improves their reflexiveness of them. Stretching can also reduce joint pain.

The hip flexors should be the focus of any hip-opening routine. By performing appropriate hip flexor stretches, you can significantly improve your day-to-day. Several stretches can help restore mobility to the hips and open you up.

1. Leg Lifts

While technically an exercise, leg lifts do stretch the hips. You want to start this exercise on all fours. Extend one of your legs straight back, so half of your body resembles a pushup pose. Squeeze the glute and hamstring of the extended leg and lift it toward the ceiling. Hold the leg in the air for a few seconds before slowly lowering it back to the ground. You can repeat this on each side, counting to a specific number of reps. You will also want to keep your back straight and your abs tight during the exercise.

2. Bridge Pose

The bridge pose is essentially a horizontal pelvic thrust, which is excellent for opening your hips. You will start this stretch lying on your back with your soles on the floor and your knees bent. You want your arms stretched at your sides. Lift your glutes from the floor until your knees, hips, and shoulders are aligned. Hold the position for 10 seconds before slowly returning to the start position.

3. Butterfly Stretch

The butterfly stretch opens the hip flexors, inner thighs, and back, encompassing the entire hip region. You start in a seated position. You to sit with the soles of your feet together. Tighten your abs and keep your spine tall. Using your hands, grab each foot, placing your elbows at your inner thighs. Inhale deeply, and as you exhale, lower your torso, keeping your spine long. Hold for 30 seconds when you feel it.

4. Yogi Squat

The yogi squat opens the inner thighs and hips. Stand with your feet about shoulder-width apart and angled outward. Crouch into a squatted position with your tailbone between your ankles. Your hands should be in a prayer position at the chest. Your elbows should be pressed against the inner thighs. As you hold your hands firmly and press your elbows against your thighs, count to 30.

5. Happy Baby Pose

The happy baby pose is an excellent stretch for the hips, spine, and legs. Start by laying on your back. Bend your legs and bring your up. You can use your index and middle fingers to grab your big toes. Pull the toes down, bring the knees closer to the shoulders, and press the elbows into the knees. Hold the position for 30 seconds.

Tight hips are a common and uncomfortable problem, likely a side effect of desk jobs and similar activities. Thankfully, stretching is a good way to relieve some of the joint pain and improve flexibility and mobility. The above exercises are an excellent place to start, but there are more hip flexor exercises to explore.

Mandelic Acid: An Essential and Gentle Skincare Ingredient

People use various over-the-counter skin care products to treat and combat dark spots, acne, wrinkles, dullness, and other skin care problems. While OTC products can include many ingredients, manufacturers use several core ingredients, including mandelic acid.

While experts agree that mandelic acid is beneficial, there is not much research supporting the specific advantages of this particular alpha hydroxy acid. Still, researchers tend to agree that the compound is gentle on the skin and is promising in treating skin texture, acne, hyperpigmentation, and premature aging.

Understanding the Origins of Mandelic Acid

Derived from almonds, specifically bitter almonds, mandelic acid is an AHA used primarily in treating acne. It differentiates itself from other AHAs by being gentle on the skin, limiting occurrences of irritation. As a gentler AHA, mandelic acid is an ideal ingredient for people with sensitive skin.

The acid is so gentle on the skin because it is among the most extensive AHA compounds. The size means mandelic acid has a slower penetration rate, resulting in less irritation.

Benefits of Mandelic Acid

Like other AHAs, mandelic acid is good for accelerated cellular turnover. The compound effectively exfoliates the skin, removing dead skin cells. By removing dead cells and exfoliating the skin, the compound helps speed up the body's natural turnover processes, meaning users end up with younger skin cells and a more youthful appearance.

Additionally, the helpful acid promotes collagen production. Collagen is the primary protein found in connective tissue and skin. The increase in collagen can help balance complexion and appearance; however, evidence of such changes is anecdotal.

Potential Uses of Mandelic Acid

While there are many potential uses for mandelic acid, it is primarily used for acne treatment. The AHA helps regulate sebum production, reduce inflammation, and unclog pores, all contributing factors to breakouts. In one study, researchers found that a chemical peel containing 45% mandelic acid was as effective as one using 30% salicylic acid. The study also found that mandelic acid had fewer side effects and was more effective in treating inflammatory acne.

For some, mandelic acid may also play a role in improving skin texture, reducing hyperpigmentation, and lessening fine lines and wrinkles. However, more conclusive research is needed in these particular areas.

Mandelic Acid Side Effects

Despite being gentle on the skin, mandelic acid can affect people in different ways. Many consumers using products containing mandelic acid will have no problems, but others might experience adverse side effects, such as:

  • Swelling
  • Itching
  • Redness

Sometimes, the appearance of symptoms, especially after several days or weeks of use, results from overuse. Most side effects subside when you limit your use of the product. However, you should stop using the product and talk to your dermatologist if problems persist.

Mandelic acid is a promising and popular skincare ingredient. It is among the largest AHAs molecularly, slowing penetration and making it gentler on the skin. It is known to be effective in treating inflammatory acne and shows promise in treating hyperpigmentation, sun spots, and aging. While used in several OTC skincare treatments, consumers should consult their dermatologists before starting any new therapy.

The Necessity of Scalp Care

Most people concern themselves with hair care, finding the right shampoos, conditioners, and treatments, but scalp care often flies under their radar. The scalp is the foundation of healthy hair; however, more than that, the scalp is susceptible to problems, including:

  • Cysts
  • Irritation
  • Itchiness
  • Flakiness
  • Sun damage
  • Acne
  • Hair loss
  • Pain

Scalp Hygiene, Hair Health, and Medical Conditions

The scalp and hair have a symbiotic relationship — if one is healthy, the other usually is. When the scalp is unhealthy, a person can experience different medical conditions, such as atopic dermatitis or seborrheic dermatitis. Both conditions can cause hair breakage, rough texture, hair loss, etc.

Atopic dermatitis is commonly known as eczema. The chronic condition causes itchy and red skin. While there are many potential causes of eczema, atopic dermatitis is often a reaction to hair care products like shampoos or dyes.

Seborrheic dermatitis or dandruff also causes redness and itchiness but can also be characterized by flakiness—dandruff results from dry skin buildup or oiliness.

Maintaining a healthy scalp is about knowing and adhering to proper scalp hygiene. If you experience scalp problems despite practicing good hygiene, consult with your primary care physician or a dermatologist.

Treating the Scalp and Common Conditions

While common, dandruff is a challenging condition to treat. Many over-the-counter products claim to treat the condition, but you must be careful about which items you choose. People are typically better served to consult their dermatologists or doctors for better and more practical remedies.

If you choose to go it alone and use OTC products, shampoos, or treatments, you will need to be selective. You will want to ensure the products have proper ingredients, including:

  • Selsun blue (selenium sulfide)
  • Salicylic acid
  • Dermazinc (pyrithione zinc)
  • Nizoral A-D (ketoconazole)
  • Tar

You do not need to use these products habitually. In fact, consumers should only use the items until the symptoms subside. Using certain products too often can nullify efficacy, meaning the items will not be as effective. Experts recommend alternating treatments every few months to avoid a loss of effectiveness.

If so, you can also try at-home remedies for treating the scalp. Some of the most effective treatments include:

  • Avoidance of styling products
  • Avoidance of products containing alcohol
  • Applying mineral oils to the scalp
  • Applying aloe vera to the scalp
  • Using tea tree oil in shampoo
  • Taking fish oil supplements

Promoting and Maintaining a Healthy Scalp

You may already have a healthy scalp, but that does not mean you are off the hook. Scalp health is an ongoing and ever-changing element. Adopting healthy practices is the only way to ensure or encourage continued health.

One of the best things you can do for your scalp is to avoid shampoos and conditioners with sulfates, alcohol, or fragrances. Certain ingredients in commercial beauty products can irritate the scalp, causing damage and promoting different conditions.

Additionally, do not overwash your hair. Most experts agree that you only need to wash your hair three to four times per week. Washing your hair more often can strip away natural oils, the same oils essential for a healthy scalp. Also, when shampooing your hair, massage the product into the hair, don't scrub. Massaging increases circulation and blood flow to the scalp.

A healthy scalp is vital to a healthy, full head of hair. Caring for your scalp can reduce the risks of specific conditions and improve hair feel, appearance, fullness, and thickness.

Cream Versus Powdered Beauty Products: The Winner Is…

When you look at your makeup collection, you likely see a variety of products. Most people have creams and powders for different occasions, but is one better than the other?

Selecting the right makeup or beauty products for your routine depends on many factors, from staying power to skin type. However, in most cases, you can choose a preferred medium.

The Pros and Cons of Cream 

Cream beauty products can help keep the skin moisturized while creating a protective barrier for the skin. The makeup products also provide a somewhat glossy or glowing finished look. However, the makeup choice is not without its drawbacks.

Pros

The primary benefit of cream makeup is the blend-ability. Creams require little effort or skill to apply, so they are great for people who are not confident with makeup techniques and blending. Additionally, creams do not require tools to apply, like brushes, adding to their ease of use.

Wearers can also rejoice in using less of the product. Creams are highly pigmented, meaning only a tiny amount of the product is necessary for preferred looks.

Finally, creams are ideal for drier or more mature skin types. Powders tend to sit in fine lines and pores; creams do not, leaving the skin hydrated and glowing.

Cons

Unfortunately, creams do not last as long as powdered makeup. Additionally, creams are not ideal for oily skin types.

Cream makeups tend to crease around the eyes, possibly becoming shiny. The makeup can also move around depending on the application and environment.

Finally, cream products only work on top of other cream products, and colors do not blend easily. You cannot use a cream on top of a powder; it will ruin the entire look.

The Pros and Cons of Powder 

Powdered beauty products offer pathways for customization, personal style, and texture. While pros and cons still exist, powdered makeups are often more popular than cream options.

Pros

Powdered makeups are long-lasting, especially when used with a foundation. The velvety, matte finish provides an airbrush quality to the skin, which many people find appealing. Additionally, powder is the best option for oily skin types.

Powdered options can also blend easily and can be layered on top of other powders and creams. Most people prefer powdered makeup around the eyes because it does not crease easily.

Cons

Powder makeup can make the skin look dull and flat when too matte. Additionally, the makeup tends to settle into wrinkles and fine lines, potentially aging the wearer.

Powder also requires makeup application tools, like brushes. Because tools are necessary, powdered makeup takes a little more skill and technique than cream.

Finally, powder makeup can appear less natural because of how it sits on the skin. It can also cause the skin to feel dehydrated.

The Verdict 

For versatility alone, powdered makeup wins the challenge. However, the verdict does not discredit the use of creams. Powders win because they allow for easier customization and can work on top of creams. Still, creams provide a more natural appearance, and for the right skin type, they might be a superior choice for some users. Ultimately, you need to determine which makeup is best for your skin and preferences.

3 5-Minute Routines To Start You Day Off on the Right Foot

Though most people dream of being the types of individuals who wake up each morning with hours to spare in which they can exercise, meditate, journal, read and simply do whatever makes their souls happy, the truth is that most humans are the get-up, get-dressed and run-out-the-door types. While there is nothing wrong with sleeping in now and then, living your life in a harried state is not fun, nor is it healthy. You need a little “you” time, and it’s hard to find that once the rest of the world wakes up. The good news is that you can get that you-time by carving out just 15 minutes of your morning to dedicate to three simple yet, refreshing routines.

Meditate

Per several studies, mediation has several benefits for the mind and body. Among others, included are stress reduction, improved memory and a strengthened immune system.

While these benefits may sound good, you likely think you don’t have time to sit and “ohm” for an hour or more each morning. Well, you don’t have to.

Sitting for just five minutes each morning to detach yourself from all thoughts can profoundly positively affect your entire day. For help with getting into the habit of meditating properly, check out UCLA’s resource of free guided five-minute meditations.

Make Note of 3 Things You’re Grateful For

Similar to the “three good things” strategy used by Martin Seligman, this strategy — as brought to you by a user on Quora — involves writing down three things for which you are grateful each morning. The user encourages you to think about what you have in your life that is good, beyond material objects. These can include friends, family members, helpful neighbors, the laugh of a child, a shift in mindset or a positive development that occurred the day before.

If you have time after coming up with three items, provide an explanation for why you are grateful for them. Starting the day off by showing gratitude — rather, than, say, bemoaning your early work schedule — can help you approach the day with a more positive mindset.

Make Your Bed

Making the bed is a simple habit that has several powerful and surprising benefits for people who actually do it … Which, most people don’t. According to the data, as many as 59% of people don’t make their beds at all, while 12% pay people to do it for them. Only 27% of individuals make the bed on their own. Those individuals are happier and more productive. This is not just a broad generalization, either. Per the data, 72% of bedmakers claim to be happy, while an astonishing 62% of non-bedmakers say they are unhappy.

There are a few reasons this may be so. For starters, making the bed is a keystone habit, which means it can start a chain reaction that could help other positive habits take hold. It’s also a manageable task that, once completed, contributes to a sense of accomplishment. In addition, Bedmaking helps to improve the visual appeal and reduce the clutter effect of your bedroom, which can help to alleviate stress. It also prepares you for things you don’t want to do.

Finally, and interestingly, making the bed may contribute to a better night’s sleep. According to the Sleep Foundation, individuals who make their beds every day are more likely to enjoy a good night’s sleep every day or almost every day compared to individuals who leave their beds a mess.

Starting your day off on a positive note does not have to involve hours of free time in the morning. By setting aside just 15 minutes to meditate, express gratitude and make the bed, you can improve your morning routine and your life.

Try This Easy Way To Work Your Glutes Just While Walking

Do you get tired of living with shapeless buns that can barely hold your pants up? The good news is that you don’t have to do endless squats or walking lunges to get some shape to your derriere. Though it may sound too good to be true, you can tone and challenge your glutes just while walking! You just have to focus on how you walk to make sure you get maximum butt-toning benefits. Here’s how I keep my backside in shape during my daily walks.

Step 1: Take Time to Warm Up

I get it, warming up seems like a waste of time when you’re already busy and struggle to fit a workout into your day. But don’t skip it! Warming up primes your muscles for movement and helps you avoid injuring yourself. Though walking isn’t exactly a high-risk exercise, it is still possible to twist an ankle or pull a tendon if your body isn’t sufficiently warmed up before you hit the trails.

Step 2: Find a Slight Incline

It’s pretty easy to walk on flat ground without breaking a sweat. But if you want to tone those glutes, you need to look for an area with a slight incline (or a steep incline, depending on your fitness level). Once you find the ideal destination, it’s time to get your form right so every step helps firm up that booty.

Step 3: Roll Through Your Steps

To recruit your glutes into your walking motions, you need to roll your feet from the heel to the toe with every step. Take this movement slow in the beginning to make sure you get the motion down. Each time you step forward, let your heel be the first part of your foot that makes contact with the ground, then sweep the motion through to the ball of your foot and push off the ball of your foot as you continue forward with the next step.

When your heel contacts the ground, squeeze your glutes together. Imagine someone just gave you a pencil and you have to hold it between your cheeks so you don’t drop it. That’s a strange place to put a pencil, I know, but the visualization really helps keep those glutes firm and strong. Only release the squeeze when you push forward off the ball of your foot into the next step.

When you’re first getting started with your “glute walk,” try to hit a goal of 100 “squeeze” steps during your walk. After that, take a break and see how you feel. If you think you can do more, go for it! Just don’t overdo it or you may not be able to sit down the next day due to soreness.

Don’t Underestimate the Power of Small Movements

Right now you’re probably thinking, “This sounds too easy. I doubt it will make much of a difference for my glutes.” But don’t underestimate the power of small, concentrated movements when building muscle and definition. Think about pulse squats, for example. You’re only moving your body an inch or so up and down, but the burning in your muscles is evidence that you’re doing some serious work and can expect great results.

I have no doubt you’ll feel the burn in your muscles when you do regular “glute walks.” In fact, you’ll probably be surprised to discover just how tired your glutes are at the end of each walk. Once your glutes get stronger, you may want to move on to more intense workouts to shape and build your behind. But glute walks are a great way to begin your journey to a more shapely behind. What are you waiting for? Get out there and start walking!

The 20 Worst Skincare Ingredients for Oily Skin

Knowing which skincare products to select isn't easy when you have oily skin. Here are five of the worst skincare ingredients for people with oily skin, plus what to choose instead.

1. Alcohol

Many cleansing products use different types of alcohol. When your skin feels oily, you may think that the solution is to strip away the oil with an alcohol-based toner. In reality, alcohol can make your skin produce more oil, not less.

It’s easy to confuse oil and moisture. They’re not the same thing. Alcohol-based cleansers mainly remove water from your skin, leaving it feeling fresh, but only for a moment. Afterward, pores shift oil production into high gear to compensate for the moisture removed.

A better solution is to choose a natural cleanser that gets rid of oil, makeup and dirt, not your skin’s moisture. Toners with aloe vera, salicylic acid, rose water, chamomile, witch hazel or alpha-hydroxy acid are excellent for people who are prone to acne.

Alcohols to avoid in skin products: SD alcohol 40, denatured alcohol, isopropyl alcohol, benzyl alcohol and ethanol.

2. Petroleum Jelly (Petrolatum)

Petroleum jelly gives moisturizers and creams a thicker, more luxurious feel. Unfortunately, for people with oily skin, these heavy skincare products can cause many problems:

  • Clogging pores
  • Trapping extra oil
  • Contributing to acne breakouts
  • Not allowing the skin to breathe properly

Other occlusives to avoid: Paraffin, beeswax and mineral oil.

3. Coconut Oil

Coconut oil contains numerous vitamins and antioxidants that are healthy for the skin. Plus, who can resist that tropical smell when you’re pampering yourself?

If you have oily skin, though, heavier oils such as coconut oil tend to clog pores quickly. Avoid using it on your arms or face. Applying a little to elbows or hands may be OK during winter weather, though.

Lightweight oils are a better choice. They can hydrate your skin and add softness without overdoing it. Grapeseed oil, sunflower seed oil, hemp seed oil, sweet almond oil and rosehip oil are all good choices.

Heavy oils to avoid: Argan, avocado, camellia, soybean, flaxseed and hazelnut oil, plus cocoa butter and shea butter.

4. Lanolin

Many women love moisturizers and hand creams that contain lanolin. It leaves skin feeling exceptionally soft. The downside is that, like petroleum jelly, it can clog pores and cause acne. People who have sensitive skin may want to avoid it as well because of the possibility of allergic reactions.

5. Silicon

Skincare experts are divided about ingredients such as dimethicone. On the one hand, this oil substitute can give lotions a silky texture and help smooth your skin. On the other hand, silicon forms a protective layer that can trap oil. With this ingredient, you may want to test it out and see the results for yourself.

Common Oily Skin Mistakes To Avoid

To look your best, avoid these common mistakes:

  • Being too rough: Oily skin isn’t invulnerable to damage. You still need to use sunscreen, avoid irritating chemicals and take off your makeup at night.
  • Over-exfoliating: Some exfoliation for getting rid of dead skin and oil is good. Doing it too often hurts your skin and triggers heavier oil production later.
  • Not hydrating: Oily skin still needs moisturizing. Just choose lightweight lotions instead of heavy creams.

There’s nothing wrong with having an oily skin type. With a little cleaning and care, you can rock a healthy glow that wows friends, coworkers and romantic interests.

Dealing With Allergies? Try These Springtime Allergy Tips

Spring is one of the most beautiful times of the year. If you live in a climate that gets snow in the winter, you probably welcome the warming temperatures and the drying ground that come in the spring. Other lovely things about spring include the birth of baby animals, birds singing beautifully all around, and trees developing gorgeous blossoms.

Unfortunately, all of these beauties come at a price for many people. If you have allergies, you probably have a love-hate relationship with spring. I understand because I’m right there with you! The good news is that you may have more control over your springtime allergies than you realize. Here is a list of some of my favorite allergy tips. Give them a try and see if they help you enjoy the spring season a little more.

Try Nasal Sprays

If you’re experiencing fun symptoms like post-nasal drip and nasal congestion as part of your seasonal allergies, there are nasal sprays that may help. Nasal steroids such as Flonase® and Nasonex® are non-sedating, so you can use them in the daytime without worrying about unwanted drowsiness. It is important to keep in mind that these types of nasal sprays don’t have immediate effects, so you’ll need to be patient and give them time to work.

Understand That Herbs Might Make Things Worse

Listen, I like herbs and think they make great remedies for a lot of conditions. But when it comes to seasonal allergies, some herbs can make your symptoms worse. This makes sense when you consider the fact that in the springtime, it’s pollen from plants that make your allergies flare up. So even if you like to use herbs for other ailments, remember that they are plants as well and you may be allergic to some of them without realizing it!

Take Antihistamines

Antihistamines block histamine release. Histamines are chemicals in your immune system that cause your allergy symptoms when they’re triggered by one or more allergens. While histamines are important, they become highly overactive in people with seasonal allergies. Antihistamines can help calm them down to ease your springtime allergy symptoms.

Stay Indoors on Windy Days

Pollen is airborne, which means that it has an easier time making its way around when the wind is blowing. If you know it’s going to be a windy spring day, do your best to stay indoors as much as possible so you can avoid airborne allergens. You should also track the pollen count so you can avoid being outside on days when the pollen count is high.

Vacuum Often

Vacuuming isn’t my favorite pastime, but when I do it regularly, it helps reduce my springtime allergy symptoms. Vacuuming is a great way to get rid of the pollens and other allergens that make their way into your home on your shoes or clothing. Dusting is also important for the same reasons.

Consider Allergy Shots

If all else fails, you may be a good candidate for allergy shots. Talk to an allergist to find out if this is a good option for your springtime allergies. Allergy shots are also known as immunotherapy. These shots can decrease your sensitivity to pollen and other allergens.

The shots work by exposing you to small amounts of a specific allergen. For example, if tree pollen triggers your allergy symptoms, you would receive an allergy shot containing tree pollen protein. It sounds counterintuitive, but when you receive small amounts of a particular allergen, it helps to desensitize you so your body doesn’t react so strongly to future exposures to that allergen.

Give These Remedies a Try

These remedies may not be a cure for springtime allergies, but they can certainly help minimize your symptoms! Give them all a try until you find out what options work best for reducing your allergy symptoms this spring.

The SPF Debate: Protecting Your Skin Against Blue Light

Research suggests blue light emitted from smartphones and computer screens can damage the skin. It is crazy to think that checking social media or writing a term paper could harm you, but it can.

It seems like every day there is something else that leads people to distrust technology. Still, despite the hoopla, research suggests blue light is not as scary as some make it out to be. Yet, it is still advised that you take necessary precautions to limit your exposure to blue light.

The Dangers of Blue Light 

Like the sun, blue light emits high-energy visible light, but it is not as dangerous. Long-term and unprotected exposure to the sun can cause DNA damage and cancer. You will not fight the same threats sitting in front of your computer screen.

Still, while smartphone or laptop use isn't life-threatening, it is harmful. The HEV light can generate reactive oxygen species — compounds that damage the cellular structure. The compounds hinder collagen production, affecting elasticity in the skin. Long-term exposure to blue light can lead to wrinkling and pigment changes in the skin.

The good news, no current research points to blue light causing skin cancer. Still, the pervasive light can cause harm, including:

  • Collagen breakdown 
  • Hyperpigmentation 
  • Premature aging 
  • Inflammation 
  • Redness 
  • Swelling or Edema 
  • Oxidative stress

Additionally, blue light affects sleep-wake cycles. Sleep interruptions can interfere with hormone production, causing skin problems. Still, more research is necessary to determine the full extent of blue light risks.

The Benefits of Blue Light

Despite the proposed risks of blue light, it does have its benefits. Medical researchers now use controlled blue light to reduce the chances of skin cancer. Controlled blue light can have positive effects. It can boost your energy levels, decrease inflammation, and reduce bacteria.

Uncontrolled blue light is where risks live. Light therapy maintains wavelengths of 415 nanometers — the proven wavelength for benefits. Sitting in front of a screen is not the same as therapeutic light, so you can't claim phone time as therapy (darn).

Protection From Blue Light 

Protection against blue light is essential. Thankfully, you do not have to spend a lot of money to protect against the HEV light. Many computers and portable devices have blue light filtration options. Additionally, you can find several apps to protect your skin and eyes. Physical products, such as blue light glasses and screen protectors, are also available.

Still, for complete skin protection, dermatologists recommend using a blue-light-blocking sunscreen. You may want to find an SPF product with zinc oxide and titanium dioxide because each is reflective. It is also possible to find newer products with beneficial antioxidants and vitamins.

People might discount the need for sunscreen indoors, but indoor environments are changing. The addition of electronic HEV-producing devices demands extra protection and concern. While indoor blue light is not as intense as environmental wavelengths, it can still harm the skin.

Researchers continue to learn new things about blue light every day. Still, what seems to become clearer is the need for added protection. While you may not be ready for indoor SPF, at least consider downloading an app.