5 Fun Facemasks That Your Kids Will Love

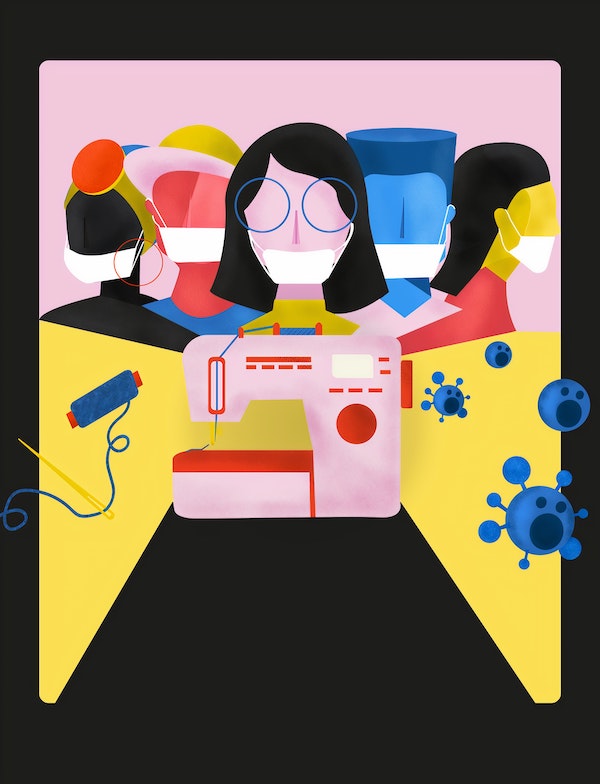
Do you find yourself wondering how in the world you’re going to get your kids to wear face masks every day when it’s hard enough to get them to put on regular clothes in the morning? It’s important to wear face masks to prevent infection and slow the spread of COVID-19, but actually putting it into practice is another matter entirely.

Before you throw up your hands and decide it’s easier to force your kids to stay inside all day, I have some good news for you! I’ve figured out a way to make mask wearing not only less dreadful, but—dare I say it?—fun! The key is to make it seem like you’re playing a game. Here are five fun face masks that your kids will actually love to wear. You can thank me later.

1. Character Fabrics

This first mask can be made by following any online DIY mask pattern for kids. The only thing special about it is the fabric it’s made from. Go out of your way to choose a fabric that features your child’s favorite cartoon character or animal. Better yet, let your child choose the fabric! That way he or she will feel personally attached to the mask and will be more likely to wear it without complaint. Win/win!

2. Cat or Dog Mask

For this cute little face adornment, make a mask from white fabric using a DIY kid’s mask pattern you can easily find on the internet. Once you’ve made it, take a black marker and draw a cute little cat or dog nose on the mask, right over your child’s nose. Add some whiskers and a mouth, and voila! What your kid once viewed as a torture device has now become his or her favorite accessory. Add a dog or cat ear headband to finish off the look.

3. Star Wars Fun

Do you have a little Star Wars fan on your hands? Capitalize on that interest by buying a few simple white children’s face masks and drawing Darth Vader’s mask on them using black marker. Or, you can turn your little cutie into an Ewok, R2-D2 or a storm trooper. Permanent marker may not be the best choice, because the fumes can make it unpleasant to wear the mask. Refer to online drawings of these characters to give you inspiration as you create your kids’ face masks.

4. I Mustache You a Question

Do you have a little dude who would love to look like his dad? Make a kid’s mask out of black fabric and sew a cute little white mustache onto it. You’ll be amazed how much easier it will be to get him to wear a mask when it makes him look like a grown up. Even little girls are likely to find mustache masks hilarious to wear.

5. Coloring Party

Have you ever noticed how possessive kids are about the things they create? They’re so possessive, in fact, that you have to sneak out at night to tuck old scribbled-on papers into the bottom of the garbage can where they can’t see them. You can use this natural possessiveness to your advantage by letting your kiddo color his or her own mask. Use markers for best results. You can even provide stencils for kids who don’t have a lot of natural artistic talent. Glittery glues, stickers and jewels create further opportunities for full customization. Your kids will have so much fun decorating and then displaying their favorite DIY masks!

There you have it. Five creative and (best of all) easy ways to create masks that your kids will love to wear. Give one or all five a try today and see for yourself how effective they can be!

5 Fun Desserts for Sensitive Tummies

Peach Ice Cream

Kids seem to have an insatiable appetite for sweets, but what if those sweets lead to rumbly or painful bellies? Here are five fun desserts you can prepare for your kids with sensitive tummies.

1. Dairy-Free Peanut Brittle

This peanut brittle is delicious and dairy-free.

Ingredients

1 cup granulated sugar

1 ½ cups roasted, salted peanuts

½ cup light corn syrup

1 teaspoon vanilla extract

1 teaspoon coconut oil

1 teaspoon baking soda

Directions

1. Stir the corn syrup and sugar together in a microwave-safe container.

2. Microwave for 4 minutes on high, then stir in the peanuts and microwave for another 3 minutes on high.

3. Add vanilla and coconut, stirring well to blend.

4. Microwave for another minute on high.

5. Add baking soda and stir for about 25 strokes, or until foaminess subsides.

6. Pour the hot mixture onto an ungreased cookie sheet. Cool completely. Break into pieces. Store in an airtight container.

Baking with Kids

2. Prunes and Coconut Milk

Here’s how to create a delicious prune and coconut milk dessert.

Ingredients

4-5 prunes

1-2 cups coconut milk

½ cup shredded coconut

Teaspoon almond flour

Cardamom and cinnamon to taste

Spritz of fresh lemon juice

Directions

1. Soak prunes in coconut milk for a few hours, or until prunes soften up.

2. Add shredded coconut to the prunes and coconut milk, then mix in the almond flour, cardamom and cinnamon. Squeeze a drizzle of fresh lemon juice on top.

3. Coconut Crème With Fruit

You can get your kids to eat more fruit by simply adding a dollop of thick coconut cream to it. Here’s how.

Ingredients

1 tablespoon coconut cream

1 piece of a favorite fruit

Directions

1. Chill a can of coconut cream in the fridge for a few hours or overnight.

2. Add 1 tablespoon of the cold coconut cream to a piece of your favorite fruit.

Some people experience some stomach upset when they consume fructose, so choose a fruit that sits well in your stomach.

4. Strawberry Bread

Here’s a soothing strawberry bread recipe that has loads of sweet flavor.

Ingredients

3 cups all-purpose flour

1 teaspoon salt

1 teaspoon baking soda

2 cups sugar

3 teaspoons cinnamon

15 ounces frozen unsweetened strawberries (sliced)

4 eggs (well-beaten)

1 1/4 cups chopped pecans or walnuts

1 ½ cups cooking oil

Directions

1. Preheat oven to 350 degrees F.

2. Grease and sprinkle flour onto two loaf pans (8”x4”x3”).

3. Mix dry ingredients in a bowl.

4. Make a well in the center of the dry ingredients.

5. Pour eggs, oil, nuts and strawberries into the well.

6. Mix thoroughly.

7. Pour into loaf pans and bake at 350 degrees F for two hours, or until a toothpick inserted into the center comes out clean.

8. Cool for 5-10 minutes in pans, then transfer to cooling rack.

Strawberries

5. Peach Ice Cream

Peaches are very nutritious fruits that show great promise for soothing the stomach. Here’s how to make delicious peach ice cream.

Ingredients

2 cups peaches, chopped

2 large eggs

1 ¼ cups sugar

2 cups heavy cream or whipping cream

½ lemon (juice of)

1 cup milk

Directions

1. Combine the peaches, lemon juice and ½ cup of the sugar in a bowl.

2. Cover and refrigerate for 2 hours, stirring every 30 minutes.

3. Remove the peach mixture and drain the juice into a separate bowl.

4. Return the drained peaches to the fridge.

5. In a separate bowl, whisk the eggs until light and fluffy.

6. Slowly whisk in the remaining sugar and blend for about 1 minute.

7. Pour the milk and cream into the mixture and whisk until blended.

8. Add the peach juice and blend.

9. Put the mixture into an ice cream maker and follow the manufacturer’s instructions.

These recipes will all satisfy your sweet tooth without giving you a massive belly ache.

5 Fruit Myths That Will Make You Think Twice About What You Pack for Kids’ Lunches

Don’t believe everything food manufacturers tell you. Here is the truth about “healthy” fruit cups, juice boxes and more:

Myth 1: Fruit Is Fine at Room Temperature

If you’re not putting cold packs in your child’s lunchbox, now is a great time to start. Keeping school lunches cool prevents bacteria from growing and it gives you more flexibility for menu planning. ALWAYS chill fruit.

Isn’t fruit OK at room temperature? Unpeeled fruit, i.e. whole apples, bananas, pears and peaches, is safe to store that way. But who wants to eat mushy strawberries and warm oranges? I sure don’t.

The moment you peel or cut fruit, it needs to be refrigerated. Put apple wedges, sliced pears or melon chunks into an airtight container right next to the cold pack.

Myth 2: Fruit Snacks These Days Are “Made With Real Fruit Juice”

ONE TINY POUCH of “healthy” fruit snacks can have the equivalent of 2 1/2 teaspoons of sugar! The ones with “real fruit” often include concentrated apple juice, which has such a high sugar content it’s practically the same as high-fructose corn syrup.

Unless you want to give kids candy for lunch, choose a different option. I like to bake oatmeal-raisin cookies or blueberry muffins since I control the amount of sugar.

Myth 3: Every Lunch Needs Fruit Juice

One of the most common myths is that juice boxes are a “normal” part of school lunches. Actually, experts recommend water and milk as the most important drinks for kids.

Juice can be a healthy choice, but it’s not easy finding the right brand. Despite the colorful pictures of fruit slices on the box, many of these drinks are 90% sugar and only 10% (or 0%) actual fruit juice. Even 100% fruit juice can have lots of added sugar.

Choose juices that list “water” and “fruit juice” as the two primary ingredients. Better yet, make your own tasty juice blend for kids when they get home from school.

Myth 4: Kid-Friendly Yogurt and Fruit Cups Are Healthy

For some reason, many parents have the idea that manufacturers create kid-friendly versions of food to help moms and dads feed good stuff to kids. Yeah, right. These huge food companies are interested in profits via lots of sugar.

“Kid” yogurt, even without sprinkles and cookies, isn’t healthy. Fruit cups are packed with extra sugar, too. Of course, I’m not saying you should choose totally plain yogurt for kids — unless you add fresh fruit yourself.

For something less sweet than kids’ yogurt but more convenient than homemade versions, choose Greek yogurt. It usually has much less sugar.

Myth 5: All Fruit Is Great for School

Don’t forget about portion control when it comes to fruit. Some types of fruit have a significant amount of natural sugar. For example, one banana has half a child’s recommended amount of sugar for the entire day!

Instead of tossing a whole banana in the lunchbox, serve one-third or half a banana. Keep cut fruit from browning by squeezing a little lemon juice over the top.

Real fruit has incredible nutrients that help your children develop into healthy adults. It’s smart to teach your kids to love these tasty alternatives to junk food. Take a little time for menu planning or talk to a nutritional expert to save time.

Delightful Herbed Frittata Recipe

Hey everybody! This is SUCH a good Fritatta recipie that I just had to share it with you all. I tried it with my own family and it was a total home-run! Try making this today and I promise you that you will wow the fam.

Ingredients

  • 4 eggs and 12 egg whites
  • 2 tablespoons water
  • 1 cup shredded Colby-Monterrey jack cheese, divided
  • 1/2 cup fresh herb, chopped (parsley, thyme leaves, cilantro, chives)
  • 1/2 cup finely chopped red bell pepper
  • 1/2 teaspoon fresh ground black pepper
Directions


  1. Whisk eggs and water in a bowl.
  2. Add herbs, red bell pepper, black pepper, and 1/2 cup of the cheese. Mix together.
  3. Spray a quiche dish with non-stick spray. Pour egg mixture into it.
  4. Top with the remaining cheese and bake at 350 degrees for 30 minutes, until fluffed and golden.
  5. Slice like pie and serve with more fresh herbs for sprinkling on top. Goes well with melon slices and strawberries.

DIY Arts and Crafts to Entertain Kids

Let’s get real, parents. When your kids are bored, they’re more likely to drive you up the wall. Since summer is right around the corner, you should start figuring out how you're all going to survive. For the sake of your sanity, it’s well worth your time to brainstorm things to do that will keep your kids absorbed. That way they won’t constantly bicker, bug you, or getting into trouble. It’s a win/win situation! Here are a few simple DIY arts and crafts that can keep your kids entertained for hours. (you’re welcome).

Fairy Jar

This fairy jar is the stuff kids’ dreams are made of. Here’s how to make it.

  1. Round up the following items;
  • One or more mason jars
  • Glow sticks
  • Glitter (for extra pizazz, choose diamond glitter)
  • Serrated knife

 2. Cut off the bottom of a glow stick. Place a towel beneath it to catch any spills.

 3. Dump the glow stick contents into the jar. Be very careful. Glow sticks have glass inside!

 4. Dump your glitter of choice into the jar. Put in as much as you want.

 5. To make sure the glow stick fluid spreads freely, break the glass glow stick component with the end of a knife while it’s in your jar.

 6. Put the lid on and shake things up like crazy!

You now have a beautiful fairy jar that will last up to 8 hours. For best results, create this craft at night.

Mini Lid Banjos

These banjos are not only adorable, but they can keep your kids enthralled for hours on end. Here’s how to make them:

  1. Gather your supplies. You’ll need:
  • Washi tape
  • Duct tape
  • Jumbo craft sticks
  • Craft glue
  • Loom bands
  • Sequins
  • Jar lids

 2. Place four loom bands around each jar lid. There should be a small gap between each band.

 3. Secure the bands in place with a piece of duct tape on the top side of the lid.

 4. Cut the end of a jumbo craft stick off (just about 1”).

 5. Wrap washi tape around the remaining craft stick to decorate it.

 6. Attach the lid (with the bands on it) to the flat end of the craft stick using another piece of duct tape.

 7. On the opposite, rounded end of the craft stick, place four small dabs of glue.

 8. Stick your plastic gems to the glue.

 9. Voila! You have the cutest little banjo there ever was.

Have your kids create many more so they can start a neighborhood band!

DIY Racetrack

This fun little activity will bring out the kid in anyone. It also exercises creativity, which is a great thing to do in a world of mindless electronic entertainment. Here’s how to create this fun activity.

  1. Gather your supplies. You’ll need:
  • Washi tape
  • A pencil with an eraser
  • Toy cars

 2. Find a corner in your home that doesn’t get used too frequently. This project works best on hardwood floor, but it will work on low-pile carpet as well.

 3. Envision how the room would look if it were a racetrack. Use light pencil lines to create your road outlines, if desired.

 4. Place washi tape down in strips to create roads.

 5. Use the washi tape to form buildings and parking lots wherever you want.

6. Get the cars out and play!

You can make your track as large or as small as you want. Keep in mind that larger tracks tend to keep kids entertained for longer periods of time.

Ways To Use Household Items for Workouts

Have you ever looked at a nice home gym set and thought “I’d need to cash out my life insurance policy to afford that”? It may be your dream to one day have a professional-looking workout area in your home, but you probably shouldn’t go into debt to make it happen. Fortunately, you don’t have to! There are plenty of items in your house that you can use for your workouts, without spending an extra dime on unnecessary equipment.

Sure, you might look and feel silly while using these items, but who cares? No one is there to see you. Besides, by the time you see your newly toned body in the mirror, you won’t care that you achieved your look with the help of a jar of pickles. So, without further ado, here are some easy ways to use household items for your workouts.

Broom-Lift Superman

If you’ve done the Superman exercise before, you know how good it is for strengthening your back muscles. Now, you can up the ante by adding weight to this already challenging workout. Here’s how.

  1. Get a broom and a pair of shoes.

  2. Tie the shoes at the laces, leaving a gap beneath the knots.

  3. Slide the tied shoelaces onto the broom handle and position them so that one shoe is hanging from one end of the broom and the other shoes is hanging from the other end.

  4. Place the broom down on the floor and lie down, face-down with the broom a few inches from your head.

  5. Grab onto the broom with both hands and straighten your arms out in front of you. Go for a wide grip with your arms out further than shoulder-width apart.

  6. Take a deep breath, tighten your core, and lift your arms off the floor as high as you comfortably can.

  7. Hold the position for five seconds.

  8. Return to your starting point while exhaling.

  9. Repeat the process 10-12 times.

You can make this exercise more challenging by lifting your legs as you lift your arms.

Water Jug Squats

A simple water jug can feel like a ton of bricks if you lift it long enough. To get a killer workout that will tone and shape your glutes and quads, do the following workout:

  1. Hold a water jug in front of your chest.

  2. Stand with your feet in a wide-squat stance with the toes turning slightly outward.

  3. While tightening your core, lower yourself into a squat.

  4. Hold your squat for five seconds.

  5. Come back to a standing position.

  6. Repeat this process for up to 30 reps.

To challenge yourself even further, hold the water jug further away from your body as you squat. This will work your chest, shoulders and arms. Just make sure you hold your core in tight so you don’t compromise your form while doing this challenging exercise.

Wall Push-Ups

Are you trying to work your way up to a standard push-up? I’m right there with you. To strengthen your push-up muscles in an easy way, all you need is a blank wall. Here’s how to do quick and easy wall push-ups.

  1. Stand about 2 feet from a wall with your feet hip-width apart.
  2. Place your arms straight out in front of you against the wall.
  3. Bend your elbows and slowly lower your body towards the wall while leaning forward on your feet.
  4. When your nose almost touches the wall, return to the starting position.
  5. Repeat this process 10-15 times.

High Calorie Foods That Are Actually Healthy

If you’re trying to eat healthy and watch your waistline, calories may seem like the enemy. It’s a well-known fact that some of the unhealthiest foods are absolutely full of empty calories. But not all calories are bad. In fact, they’re crucial for your health and survival.

Check out this list of nutritious foods that are surprisingly high in calories, and you’ll see firsthand that you can achieve optimum health by including quality high-calorie foods in your diet. Just make sure you eat them sparingly, because any high-calorie food can make you gain weight if you eat too much of it.

1. Peanut Butter

Peanut butter is one of the most versatile high-calorie foods out there. You can find it in everything from Asian cuisine sauces to candy bars. It also happens to be good for you. This delectable nut butter provides a decent amount of protein, as well as vitamins and minerals such as zinc, magnesium and potassium.

Unfortunately, you won’t reap the health benefits of peanut butter if your daily serving comes from a candy bar or cookie dough batter. Instead, try smearing a tablespoon of smooth and creamy peanut butter into the crevices of fresh celery stalks. The peanut butter will help satiate you and the celery will delivery a powerful punch of vitamins and minerals (plus, it has an incredible crunch).

2. Nuts

Nuts are amazing snack foods  because they fill you up so effectively. This is partially because of their high calorie content (which tops at a 190 calories per ounce for some varieties). But don’t let that scare you away.

Nuts are rich in protein, fiber and various essential nutrients. Try substituting a small handful of nuts for your favorite unhealthy crunchy foods, such as chips or cookies.

3. Quinoa

Quinoa (pronounced “keen-wah”) is a funny-looking grain that hasn’t yet become popular in many American dishes. But if people realized how nutritious this little grain is, they’d want to eat more of it every day! Quinoa is one of the few complete proteins in this world (which means it contains 9 essential amino acids). It’s also high in omega-3 fatty acids and fiber, which are both great for controlling diabetes. Be careful to eat it in moderation, though, since a single cup of the cooked stuff contains 222 calories.

4. Olive Oil

There are some types of oil that have a bad reputation for a reason. Low-quality oils such as vegetable oil or canola oil are full of omega-6 fatty acids, which can be harmful for your body if consumed in large amounts. Olive oil, on the other hand, has a much healthier ratio of omega-6 to omega-3 fatty acids. It also has strong ant-inflammatory properties and may help you manage your blood pressure. Who knew?

Olive oil has just under 120 calories per tablespoon, so try not to go crazy with it. Just a teaspoon here and there will do you good. Try drizzling a bit on a fresh salad or using it to cook your vegetables and meats.

3 Protein Packed Breakfasts To Kickstart Your Day

To get the full fat-burning benefits of a high-protein breakfast, you should always aim for at least 20 grams of protein. If you hit the range of 30–39 grams, that’s even better for slimming your waistline.

A 7-oz. serving of Greek yogurt has you covered all the way (20 grams). You can also pair two large eggs (13 grams) with 1 oz of your favorite cheese (about 6 grams) and a slice of whole-wheat bread (3 grams). Here are a few of my preferred high-protein breakfasts:

1. The Brilliant: Smoked Salmon on Whole-Grain Toast

When you’re in a massive hurry, nothing beats the combination of speed and flavor of whole-grain toast with smoked salmon. Even better, there are endless ways to customize it depending on your mood. To get your SoCal vibe on, add a few slices of smashed avocado.

Salmon is packed with Omega-3 fatty acids, which are perfect for keeping you alert, happy and energized during the day. They take amazing care of your brain and heart while helping you burn calories.

Pop a slice or two of whole-grain bread into the toaster, then layer on delicious cream cheese or cottage cheese. Top each slice with 1 oz of salmon and your favorite microgreens. Personally, I love alfalfa sprouts, chopped chives and a sprinkle of lemon.

2. The Exotic: Turkish Fried Eggs

Eggs are one of the best sources of protein for breakfast, so you’re probably going to be including them at the breakfast table often. How can you give them a spectacular twist that gets you excited every morning? Try transforming fried eggs or omelets with exotic inspirations.

For Turkish eggs, start by sauteing garlic, spinach, red onions and chopped chili peppers in olive oil. As soon as the onions start to caramelize, pop in two or three eggs and cook to your liking. Serve this colorful combination and top with a generous portion of Greek yogurt and a sprinkle of salt and lemon juice.

3. The Fun: Quinoa With Almonds and Bananas

This one’s for all you moms out there. It’s super easy to make and extremely popular with kids. That means no fighting and no drama in the morning, which is honestly a blessing when there’s not much time before the school bus arrives.

Quinoa is a nutritious millennial grain that’s a breeze to cook. It’s like eating a bunch of jelly-filled pearls, so little kids have a blast. The chopped bananas and almonds add a nice touch of sweetness and crunch to the mix, making this breakfast favorite irresistible for small taste buds. Finish it off with some 1% milk or soy milk for nutritious and delicious creaminess.