How and Why To Try Hot Yoga at Home

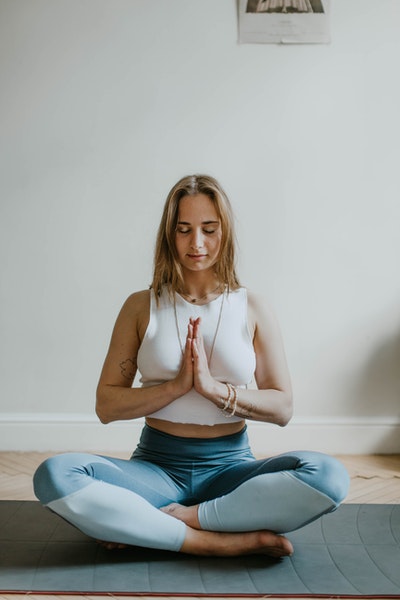
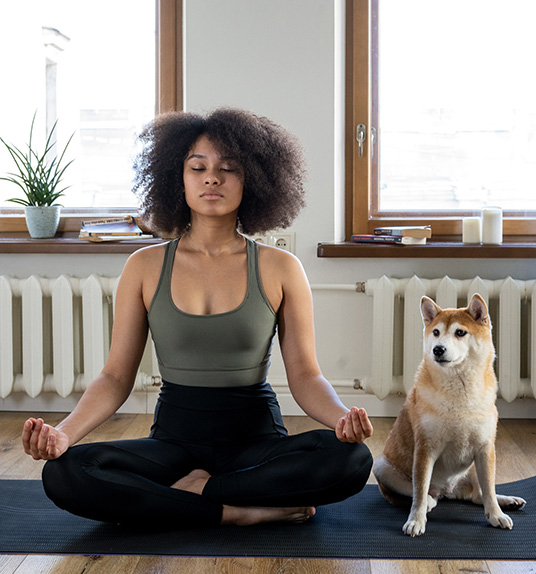
Hot yoga is the “hot” new workout trend that offers a wide variety of benefits. If you think the idea of doing yoga in a hot and sweaty environment sounds like torture, you’re in for a treat! While it’s true that yoga isn’t “hot” unless it’s done in a humid and warm environment, it’s a much more enjoyable practice than you’re probably imagining in your head. You don’t have to take my word for it, though. Here’s how and why to try hot yoga in your own home this week.

Understanding the Point of Hot Yoga

I have to admit, I used to look that people who did hot yoga were a little crazy. Why in the world would you choose to exert your body in an environment that forces you to release as much sweat as possible? But now that I’ve learned more about it, I’ve come to understand the point of this unconventional form of exercise.

Hot yoga offers the same benefits as traditional yoga (you know, the standard benefits like improved strength, stress reduction and flexibility), but it also gives you an even more intense workout in less time. So if you don’t have an hour to spend on a typical yoga routine, you can spend half an hour doing hot yoga and get the same benefits! Plus, the humid environment a hot yoga session provides is meant to replicate the humid natural environment found in India, where yoga originated. So you get a more authentic experience from doing hot yoga than from doing traditional yoga in an air-conditioned environment. Just make sure you drink lots of water before you get your sweat on!

Benefits of Hot Yoga

Now that I’ve got you thinking hot yoga may not be so bad, here’s a list of some of the impressive benefits the practice can provide.

  • Increased calorie burn

  • Improved flexibility

  • Reduced stress

  • Improved mood

  • Boost in cardiovascular health

  • Improved bone density

  • Decreased blood glucose levels

Now keep in mind that in order to maximize these benefits and stay safe during your hot yoga session, you need to stay hydrated. Drink water before, during and after your hot yoga session. You may also want to guzzle a low-calorie sports drink to restore your body’s electrolyte balance.

If you’re pregnant, don’t do hot yoga unless you’ve been given the green light from your doctor. And if you have certain health conditions, such as low blood sugar, heart disease, anorexia or a history of fainting, hot yoga may be too intense for you.

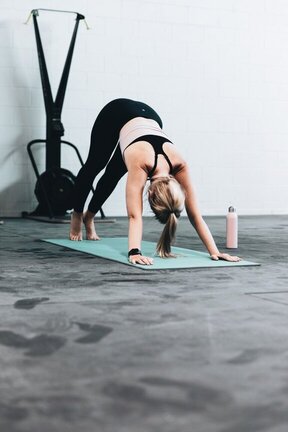
How to Start Hot Yoga at Home

While prepping your space for a hot yoga session requires a little effort, it’s worth it if you don’t have a gym membership or don’t have time to go to an official hot yoga class. Here’s how to set up any room in your home for hot yoga.

  1. Designate one room in your home for you hot yoga session, and close the doors and windows.

  2. Put a small space heater in the room to bring the space to your desired temperature.

  3. Consider adding extra layers if the space heater isn’t getting the room warm enough for your liking.

  4. Bring in a humidifier and steam things up!

  5. Have a water bottle on-hand at all times.

  6. Complete your planned yoga session, making sure to take frequent water breaks throughout.

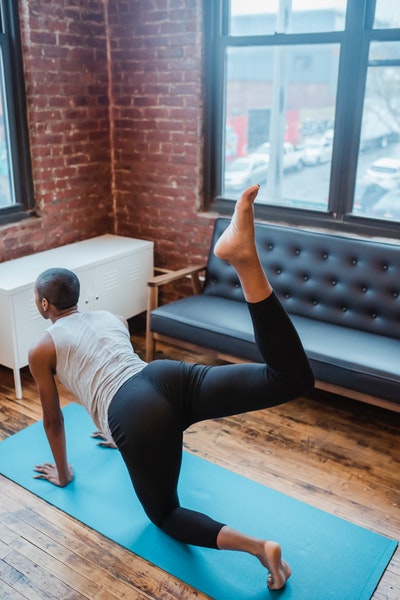
  7. If you need help coming up with your own hot yoga workout routine, look online or find a favorite workout on YouTube. You can also make things more fun by inviting a friend to come work out with you.

Hot yoga isn’t for everyone. But for those who like a challenging workout that delivers maximum benefits in minimal time, it’s a must-do routine to work into your weekly schedule. Give it a try this week to see if you’ll fall in love with it like I did!

4 Alternatives to Traditional Glute Workouts

The glutes are among the strongest muscles in the human body. The glutes are critical to daily activities from walking, standing, sitting, and bending. At a physiological level, the backside is the foundation for good posture, maintaining a neutral pelvis, and ensuring correct lumbar curvature. Aside from providing necessary stability, many people consider toned hindquarters attractive.

There are several exercises for toning and strengthening the glutes. Some of the more common bun exercises include:

  • Squats 
  • Glute bridges 
  • Glute kickbacks 
  • Abductor raises (fire hydrants)

Unfortunately, most people do not perform these workouts correctly, rendering them useless. To strengthen and tone your rear, you need to focus on form and follow-through. People may want to exchange traditional glute workouts for easier and more targeted alternatives.

1. Exchange Quarter Squats for Deep Goblet Squats

Squats are one of the foremost exercises for building glute muscles, but too many people ignore proper form. Most people perform quarter or mini squats, exaggerating a hip thrust to engage the buttocks. Shallow squats do little to build or tone the glutes, regardless of the number of reps.

A better exercise is a goblet squat. You will need a kettlebell or dumbbell to perform this variation of a squat. Hold the weight to your chest, move into a squat position by hinging at your hips, but don't stop. You want to sink to a full depth. To return to a standing position, push up using your glutes and hamstrings, ensuring your knees track outwards.

2. Alter the Speed and Posture of Glute Bridges

Glute bridges are an effective exercise, but form and movement matter. Too many people rush the activity, acting like they are in a bad 80s workout infomercial.

A glute bridge requires slow, deliberate movement to activate the proper muscle groups. You start the exercise on your back, pulling your heels in until they almost touch your butt. Tighten your core muscles, and then, putting the force into your heels, lift your butt off the floor. Keeping your core tight and back supported, continue the lift to your full range of motion. Squeeze your glutes at the peak and hold before slowly lowering to the starting position. This exercise is about engaging the right muscles and moving slowly and steadily.

3. Change Kickbacks to Romanian Deadlifts

Despite the popularity of glute kickbacks, the exercise is challenging for most beginners. Many people think they are doing the exercise correctly, but in reality, they often fail to engage the glutes. The movement also creates risks of injury.

A safer and more effective exercise is the Romanian deadlift. You will need a set of dumbbells. Hold a dumbbell of equal weight in each hand. With a straight back and arms at your sides, hinge at the hips, slowly lowering the weights. Lower to your full range of motion before slowly lifting yourself back to the starting position.

4. Cut Fire Hydrants for the Curtsy Lunge

Like kickbacks, abductor raises, or fire hydrants are potentially problematic and ineffective glute workouts. Many people hinder the strengthening of their glutes by compensating for imbalances; transferring tension to other areas of the body.

The curtsy lunge is a more effective glute workout. Put your weight on the right leg. Move your left leg back, crossing it behind your body in a curtsy-like position. You will dip into the lunge, putting the weight of your body on the outside of the right foot. Perform several reps before switching to the left leg.

Strong, defined glutes require exercise. The correct exercises should reduce injury risks and ensure proper form.

Try This Easy Way To Work Your Glutes Just While Walking

Do you get tired of living with shapeless buns that can barely hold your pants up? The good news is that you don’t have to do endless squats or walking lunges to get some shape to your derriere. Though it may sound too good to be true, you can tone and challenge your glutes just while walking! You just have to focus on how you walk to make sure you get maximum butt-toning benefits. Here’s how I keep my backside in shape during my daily walks.

Step 1: Take Time to Warm Up

I get it, warming up seems like a waste of time when you’re already busy and struggle to fit a workout into your day. But don’t skip it! Warming up primes your muscles for movement and helps you avoid injuring yourself. Though walking isn’t exactly a high-risk exercise, it is still possible to twist an ankle or pull a tendon if your body isn’t sufficiently warmed up before you hit the trails.

Step 2: Find a Slight Incline

It’s pretty easy to walk on flat ground without breaking a sweat. But if you want to tone those glutes, you need to look for an area with a slight incline (or a steep incline, depending on your fitness level). Once you find the ideal destination, it’s time to get your form right so every step helps firm up that booty.

Step 3: Roll Through Your Steps

To recruit your glutes into your walking motions, you need to roll your feet from the heel to the toe with every step. Take this movement slow in the beginning to make sure you get the motion down. Each time you step forward, let your heel be the first part of your foot that makes contact with the ground, then sweep the motion through to the ball of your foot and push off the ball of your foot as you continue forward with the next step.

When your heel contacts the ground, squeeze your glutes together. Imagine someone just gave you a pencil and you have to hold it between your cheeks so you don’t drop it. That’s a strange place to put a pencil, I know, but the visualization really helps keep those glutes firm and strong. Only release the squeeze when you push forward off the ball of your foot into the next step.

When you’re first getting started with your “glute walk,” try to hit a goal of 100 “squeeze” steps during your walk. After that, take a break and see how you feel. If you think you can do more, go for it! Just don’t overdo it or you may not be able to sit down the next day due to soreness.

Don’t Underestimate the Power of Small Movements

Right now you’re probably thinking, “This sounds too easy. I doubt it will make much of a difference for my glutes.” But don’t underestimate the power of small, concentrated movements when building muscle and definition. Think about pulse squats, for example. You’re only moving your body an inch or so up and down, but the burning in your muscles is evidence that you’re doing some serious work and can expect great results.

I have no doubt you’ll feel the burn in your muscles when you do regular “glute walks.” In fact, you’ll probably be surprised to discover just how tired your glutes are at the end of each walk. Once your glutes get stronger, you may want to move on to more intense workouts to shape and build your behind. But glute walks are a great way to begin your journey to a more shapely behind. What are you waiting for? Get out there and start walking!

My Favorite Cheap Fitness Items for an Amazing Workout

For a lot of people, constantly chasing the next workout equipment fad turns into an obstacle instead of a solution. It makes exercise seem like a luxury instead of an essential part of your life. Fewer than 25% of people in the U.S. do cardio and strength training every week.

State-of-the-art exercise equipment can be awesome for burning calories, but you don’t need it to enjoy an amazing workout. Here are my favorite fitness items for any budget.

1. Jump Ropes (Weighted and Regular)

A trusty jump rope can quickly become your best friend for working out on the go. This inexpensive piece of gear has the power to strengthen your glutes, core muscles, legs, shoulders and arms. It gives you a full-body workout with huge cardio benefits.

The speed is entirely up to you. You can take it slow as a warmup to other exercises. When you’re doing upper body strength training, tossing in jumps is a great way to increase your heart rate for maximum fat burning.

Weighted ropes help you exercise your arms even more. On the other hand, lightweight jump ropes are easier to handle for side-to-side and backward jumps. Both types often cost under $10.

2. Battle Ropes

These thick ropes are a lot of fun for getting rid of stress, and they give you a bigger workout than you may think. Battle ropes are huge cords that you move up and down while performing other exercises.

If you want to save even more money, you can go the do-it-yourself route with these bad girls. Walk into the hardware store and ask for 50 feet of 1.5- or 2-inch manila rope or nylon cord. Wrap duct tape around the ends.

For your workout, head to your backyard and wrap the rope around a tree so you have two equal lengths. From there, you’re ready to do unilateral waves, bilateral waves and reversing circles.

3. Wearable Weights

Ankle weights and wrist weights can increase the burn from easy exercises. You can do leg lifts with ankle weights to strengthen your calf muscles and see better results.

For many people, wearable weights are more comfortable than gripping free weights, and they’re safer than swinging a kettlebell around. Using 1- to 3-pound weights can increase your calorie-burning significantly.

If you’re going for a relaxing walk, you can increase the heart benefits by strapping on some arm or leg weights. You shouldn’t use ankle weights for jogging or speed walking, though.

4. Resistance Bands

Another great way to do strength training without investing a lot of money is with a set of resistance bands. These elastic bands come in different pull strengths and sizes. The list of possible exercises is pretty huge:

  • Front and side taps
  • Leg lifts and thigh lifts
  • Squats
  • Lateral leg stretches
  • Triceps stretches
  • Biceps curls
  • Shoulder raises
  • Abdominal crisscrosses with foot band

It doesn’t cost much to have a range of resistance bands for exercises focused on building muscle. They can help you improve your balance and keep your body flexible.

The truth is that cheap fitness gear can give you a workout that's just as intense and effective. Plus, it requires less space and is fast and easy to use.

How To Tell if You’re Doing an Exercise Incorrectly

Have you ever tried a new workout and ended up in pain for a few days with a pulled muscle or some other type of unexpected injury? Don’t worry, I’ve been there, too. It can be fun to try new workouts (hello, AcroYoga!) but if you don’t take extra care to ensure you’re performing the exercises properly, you can easily hurt your body.

To help you avoid injuries in the future, here are my top tips for recognizing when you’re doing an exercise incorrectly. (You’re welcome).

You Experience Pain

You know the old saying, “Pain is gain”? Well … that isn’t always the case. It’s normal to feel some physical discomfort when you exercise, but you shouldn’t feel pain. The minute your body sends pain signals your way is the minute you need to stop what you’re doing and analyze your form.

When I mention pain, I mean during the exercise itself, not afterward. Unfortunately, it’s almost impossible to avoid the muscle pain that inevitably develops after a good workout. But if you’re doing squats and your knees are screaming at you, there’s no reason to be a tough guy or gal and keep punishing them. Pushing through intense pain can cause long-lasting damage to your joints and soft tissues.

So the next time you feel like your shoulder is going to burst out of its socket while you’re doing lateral arm raises, stop what you’re doing. Your body is trying to tell you it can’t complete that motion right now. You might try other exercises that target the shoulder muscles or simply give your shoulders a break until they feel better.

You Feel Sore for Days After a Workout

Some muscle soreness is normal after a good workout and can be an indication that your workouts are delivering results. But if you’re sore for days after your sweat session, you’re probably working too hard and taxing your body too much.

Muscle soreness happens as a result of tearing your muscles down. The muscles then repair themselves (which is why getting sufficient rest after a workout is important). Don’t worry, the muscle tear-down process is normal and is the primary way to get stronger, more defined muscles.

While some muscle damage from a workout is normal and even desirable, you don’t want to tear your muscles down too much. If you’re feeling sore for days at a time after your workouts, you’re most likely tearing your muscles down more than you should. Try to cut back a little on your workout intensity until the soreness becomes less pronounced and long-lasting.

You’re Dreading Your Workout Sessions

Working out should feel good (even though it pushes your body outside of its comfort zone). Exercise releases endorphins and increases oxygen delivery to your body’s various tissues. Though it’s normal to feel a little bit lazy when your scheduled workout rolls around, it’s not normal to dread your workout sessions.

If you’re feeling anxious about working out, you’re probably pushing yourself too hard. At the end of a good workout, you should feel energized and accomplished, not exhausted and depressed. To bring the fun back into your workouts, go gentle on your body and don’t push it too hard. You can also make your sweat sessions more fun by inviting a friend to work out with you.

Make Your Workouts Enjoyable

You can’t enjoy a workout if you’re doing the exercises wrong, trust me. If you leave the gym feeling like you’ve just been beaten up, you’re most likely doing at least one of your exercises with improper form or too much intensity. Listen to your body and learn how to recognize the common indications that you’re doing an exercise wrong. Then stop the exercise or take the time to learn how to get your form right before you continue.  

The Tremendous Benefits of Cycling

When most people get their license and a brand-new used car, their bicycles wind up in the garage collecting dust. As adults, bike riding is a childhood pastime; it serves a minimal purpose in the hustle and bustle of grown folks' business.  

The simplistic attitude is somewhat fair when thinking of a bicycle as an effective mode of transportation, especially for the multitude of adult obligations. However, a bike is still fun, potentially relaxing, and a beneficial exercise machine.

1. Cardiovascular Health

Cycling, above all else, is a form of cardiovascular exercise. Whether you use a stationary indoor bike or a standard bicycle, cycling can improve your system's circulation and oxygen distribution, and it can increase your aerobic tolerance or capacity. 

Depending on the form of cycling you do, the activity can also improve insulin sensitivity and blood pressure. Stationary cycling classes that incorporate high-intensity interval training seem to benefit these areas most.

2. Low-Impact

Most people acknowledge the advantages of running for cardiovascular health. Unfortunately, running is hard on the knees, hips, and ankles. The amount of force on the joints, ligaments, and tendons can lead to long-term and compounding damage in runners.  

Cycling reduces the shock on the system. Riding a bike is considered a low-impact form of exercise, meaning your body can still receive cardiovascular benefits without risking potential injuries or degradation of the joints. 

3. Coordination

Regardless of the style of cycling you gravitate towards, the activity requires significant coordination. However, beginners should not let the need for coordination stop them from enjoying riding. 

The repetition of cycling will establish greater coordination over time. The more you ride over busy bike trails or participate in rhythm-based cycling classes, the more your abilities will start to rise to the challenge.

4. Stamina

When you start cycling, you might only get around the block or last a portion of a class. Do not let assumed failure deter you. Many people set expectations beyond their current abilities, which is why setting smaller goals, to begin with, is best.  

Set a goal for a single trip around the neighborhood or a shorter distance. The goal you set should be manageable and somewhat easy until you learn your limits. The beauty of riding a bike is the activity is compounding. You will build endurance and stamina the longer you train. 

5. Posture

Many people do not consider posture when cycling. Then hop on the bike, grab the handlebars, and start pedaling. Unfortunately, the lackluster approach to riding can result in back pain. 

Posture is a crucial aspect of cycling and riding comfortably. When you mount your bicycle, you want a neutral spine, meaning it is straight and relaxed, not arched and strained. Your shoulders should be down and back, not curved in a "whatever" position. Practicing an accurate riding position can improve your posture even off the bike.

6. Strength Training

Believe it or not, riding a bicycle is a form of strength training, primarily for the lower body and core muscles. Cycling requires balancing muscles, making it an excellent exercise for older individuals. 

You can increase your workout by using the various gear settings or choosing more challenging terrain. An uphill ride will really challenge your leg and core muscles. 

A bicycle might spark images of favorite childhood memories, but cycling is not a pastime; it is a current and effective form of exercise. If you haven't ridden in a while, maybe it's time to dust off the saddle.

Can Walking Be as Effective as Running?

Walking or running, which is the better exercise? People constantly debate the best form of cardiovascular exercise. When performing a search online, you will likely find communities that back each method of training, which they can and should. Each activity is beneficial in its own right, meaning there is no shame in using both in your workouts. Variety is often more preferential than any one exercise to maintaining health and building muscle.

The problem comes when people argue over the effectiveness of either running or walking. When compared apples to apples — flat running versus flat walking — running wins with the calorie burn. However, running is more taxing on your knees, ankles, etc., which is why many people, especially those dealing with arthritis or injuries, prefer walking to running.

Truthfully, there is no reason you cannot experience an equivalent calorie burn while walking. You either need to walk for longer periods or start an incline regimen. Walking at a continuous incline burns more calories than flat walking, and it can burn a similar number of calories compared to flat running.

The Advantages of Incline Walking

While running is an excellent cardiovascular exercise, it is an aggressive and potentially abusive activity. Your knees and other joints sustain multiple and repetitive impacts that can worsen existing injuries or lead to damage later in life. 

Fitness experts have known that walking is less damaging than running for a long time. The impacts the body contends with during walking are less vigorous, softer. The big drawback to walking compared to running is the calorie deficit. Flat running and flat walking are not equivalent when it comes to calorie burn, and walkers will need to double or even triple their time exercising to receive the same benefits s runners. However, walking at an incline changes everything.

Incline walking engages stabilizer muscles and requires more energy than walking on a flat surface. The muscle engagement and energy burn are equivalent to flat running, if not better, in some ways.

By engaging the back, hips, and core, incline walking helps develop muscles key to balance. As people age, balance tends to weaken, becoming a significant threat to safety. With more developed stabilizer muscles, aging individuals can reduce the risks of falling and the injuries that stem from it.

Aside from building critical muscles, incline walking is still walking, so the typical advantages of walking over running remain, primarily reduced impact injuries. Walking does not require the same footpad collision with the concrete, meaning the body does not need to absorb as much force, even when incline walking.

Both Exercises Are Beneficial

No one is saying that you should never run. Running is an effective form of exercise. Still, it is not safe for everyone. 

People at a greater risk of injury should avoid running. Walking is preferential for those with arthritis and other musculoskeletal injuries. While flat walking will not provide the same calorie loss as running, incline walking does and in the same amount of time.

When choosing or planning your exercise routine, you should consult with your primary care physician to determine what activities are safe and most beneficial. Even if you cannot run, incline walking can provide a safer and equivalent form of exercise, especially from a calorie-burn perspective.

Do you have any experience with incline walking, or are you willing to give it a try? Leave a comment below.

8 Reasons To Love Kettlebells

Typically, when people want to focus on fitness, they invest in large machines and equipment. The expense for a full gym setup can reach into the thousands, but there are effective full-body alternatives, including kettlebells.

Kettlebells are one of the most effective pieces of home gym equipment currently on the market. The odd-shaped balls with large angular handles are popular among trainers and enthusiasts because of the ease of design and integration into workout routines.

If you are looking to create your home gym, you should start with a variety of kettlebells. These unique tools provide several benefits for the average to experienced fitness level.

1. Grip

Have you ever wanted to improve your grip strength but struggled to find an effective tool or piece of equipment. The kettlebell not only requires grip strength but also helps build strength in the hands.

Using the equipment as a preventative for specific genetic conditions, such as arthritis, can help prolong use and movement. The best part is, the kettlebells come in various weights to suit all skill and strength levels.

2. Cardio

A kettlebell workout is about continuous movement. Because you maintain motion, these workouts are excellent alternatives to cardio workouts requiring running, meaning you can get your cardio in while avoiding unnecessary impacts.

3. Space

Many homeowners want to create a private gym in their house but lack the space for large equipment. Even free weights can take up a significant amount of room. Kettlebells do not, thankfully. You can have a complete set of kettlebells without taking up more than a corner of your basement, garage, or bedroom.

Additionally, if you want to avoid having unsightly gym equipment taking up permanent residence in your bedroom or another area, consider the size of kettlebells. The equipment is small and can easily be stored in a closet or under a bed.

[insert page='Offer' display='content']

4. Portability

The small size of kettlebells means they are incredibly portable. You can exercise anywhere in your home, and if the urge strikes, you can pack the kettlebells in your car and head to your favorite outdoor location.

5. Time

Because kettlebells provide a full-body workout, the routine is typically quicker than using traditional equipment. You can find many training series to coach you through the workout routines. Additionally, you can look on YouTube for tutorials if you want to save some money.

6. Coordination

There are many kettlebell exercises that require hand-eye coordination. Additionally, depending on the routine and stance, workouts can require full-body coordination. Again, this places kettlebells above other equipment.

7. Balance

Beyond coordination, kettlebells require balance. The entire process is an excellent option for people wanting to improve their flexibility, balance, and mobility. However, before you opt for kettlebells, consider talking to your doctor to discuss your plans.

8. Conditioning

Kettlebells are excellent tools for full-body conditioning. From cardio to weightlifting, you will build muscle and stamina throughout your body.

When looking to create a workout space at home, wait to purchase large machines and weight sets. Kettlebells provide many of the same benefits while saving you money and space.

Would you ever use kettlebells? Comment below.

The 3 Best Yoga Moves To Stretch and Relax a Desk Chair Body

Many people work desk jobs, which typically equates to a sedentary lifestyle despite being super productive during your eight to 10-hour shift. Beyond being compared to smoking or cancer, sitting all day can lead to sore hips and a knotted back.

While there isn’t much to be done at work, aside from purchasing a better chair or a standing desk, you can improve your health and wellness outside of the office. Yoga is one activity that is surprisingly helpful when it comes to relieving sore muscles and stiff joints. The focus on breathing, stretching, and slow and controlled movements are the key to relaxing your body and finding relief. While all yoga is beneficial, several moves can help ease a rigid desk chair body.

1. Standing Forward Fold

The forward fold can help relieve compressed muscles by slowly stretching them. It is a simple move but quite effective when performed correctly. You want to stand with your feet slightly apart, about hips-width. With your hands on your hips, inhale deeply and stretch your arms straight out above you. As you exhale, you want to bend at the hips, folding forward and engaging your abs. Tuck your chin to your chest and relax your shoulders as you extend the top of your head toward the floor, stretching your spine. You want to keep your legs as straight as possible and shift your weight forward. You can either let your hands hang down toward the floor or grab the opposite elbow. Hold the pose for 30 seconds before slowly returning to an upright position.

[insert page='Offer' display='content']

2. Downward Facing Dog

The downward-facing dog pose focuses on strengthening all those areas that are stiff or sore from sitting all day: shoulders, back, hamstrings, and calves. To perform the pose, start on your hands and knees, your hands should rest on the floor beneath the shoulders, and your knees aligned with your hips. Inhaling, tuck your toes under your heels, and exhaling, lift your hips into an upside-down V shape. Spreading your fingers wide, create a line from your elbow to your middle finger on each side. Relax your head. Hold for 30 seconds.

Try to improve your posture every time you perform this pose. Work on lowering your heels to the ground and straightening your legs for the best possible stretch.

3. Cat-Cow Pose

The shoulders, chest, and spine tend to be the most affected by sitting all day. The Cat-Cow pose is a way to open up these areas while mobilizing the spine. Start in the same position as the downward dog pose, on your hands and knees, each aligned under the shoulders and the hips, respectively. Inhale deeply, and on the exhale, you want to pull your belly button up toward the spine, curving your back toward the ceiling. Allowing your neck to relax, bring your chin toward your chest. You are now in the cat position.

As you inhale, let your belly drop toward the floor and arch your back, lifting your head and tailbone toward the ceiling without straining your neck. You are now in the cow position.

Cycle through each position 10 times, controlling your breathing and focusing on posture. Remember to limit tension on the neck. These poses are intended to focus on the back, shoulders, and chest.

While yoga has many benefits overall, these three positions offer significant benefits to those who sit at a desk all day. What are some poses you would suggest? Leave a comment.

Which is Better: Pilates or Barre?

The Barre workout method has been gaining traction over the last several years, motivating several gyms to institute classes and programs. The technique is of particular interest to former dancers or those who admire most professional dancers' muscular physique and lean appearance. The most interesting thing about the Barre method is that it is advertised as a complement to Pilates and yoga and not an alternative. In truth, while more intensive, the workout does incorporate several principles and movements of Pilates, but it is more focused on the outcome of a dancer's body. Despite the apparent differences in styles, the goals of Pilates and Barre are pretty similar; Therefore, while most people want to look at exercise programs as an either-or situation, that is not the case with these two methods.

Looking Into the History of Each Method

Out of all the workout methods, there are few with such a storied history as Pilates. The founder of the technique, Joseph Pilates, created it while imprisoned in an internment camp during World War I. He wanted to help fellow cot-ridden prisoners maintain their health and mobility. Coming from such humble beginnings, Pilates has grown into a fitness and wellness program used by people from many walks of life, from pro-athletes to post-op patients.

While not as endearing or awe-inspiring, Lotte Berk, a dancer and teacher, is credited with inventing the original Barre method, the Lotte Berk Method, in 1959. She based her program on ballet, focusing on the core. The Barre method has evolved to incorporate movements from Pilates and yoga and focuses on measured movements, emphasizing form.

[insert page='Offer' display='content']

Similarities Between Barre and Pilates

Both Barre and Pilates are mental and physical disciplines. Each leads to similar results: improved flexibility and posture, sculpted and toned muscles, increased flexibility and mobility. Additionally, neither method requires high strain on the body, making it safer for most people than other exercise programs.

As mental disciplines, each method requires precision and focus to perform techniques. The level of concentration can lead to increased clarity and mind-body cognizance. Additionally, as each is a form of exercise, they result in the release of endorphins, causing feelings of relaxation and reduced stress levels.

Differences Between the Barre and Pilates Methods

The most apparent difference between the two methods is the use of equipment. Barre is a minimalist routine, using only a barre, mat, the occasional exercise ball, and your body weight. Alternatively, Pilates does require light hand weights and magic circles or Pilates wheels attached to some apparatus.

Barre also requires participants to push their muscles to the point of fatigue by focusing on intense, small movement in an aerobic setting. Pilates is non-aerobic and focuses on all muscle groups with the incorporation of various small and large movements. The primary goal of Pilates is to improve flexibility and core strength through a full-body workout.

The Primary Takeaway

Neither Pilates nor Barre is a superior workout by comparison. Each method achieves similar goals, and both live in a similar community. If anything, Barre is an excellent complement to Pilates, as the former often requires a cardiovascular or aerobic partner to achieve maximum results.

While Pilates and Barre are a part of a larger group of exercise methods, each provides unique benefits. One approach does not overshadow the other. If you are interested in a fun and effective regimen, consider using both methods to achieve superior results. If you only want to choose one, consider your current physical state.

Which method do you choose? Leave a comment.